Showing posts with label Glitter. Show all posts

Tuesday, October 23, 2012

Crafternoon: DIY Preppy Pumpkins


Last year my boss and I had a crafternoon at work and made these great Lilly pumpkins!

They were easy and you don't need many supplies at all!

Supplies:
1. Pumpkins: we used hollow ones from Hobby Lobby that were light and small
2. Wrapping Paper: in your print of choice
3. Mod Podge: lots, this is more like paper mache!
4. Glitter: if you want to make a baby glitter pumpkin
5. Green paint if you want to spruce up the stems

Steps for wrapping paper pumpkins:
1. Cut your wrapping paper into 1'' thick strips--this makes placement on the pumpkin MUCH easier
2. Paint a small section, maybe 3'' wide, of your pumpkin with Mod Podge
3. Cover that wet area of the pumpkin with dry wrapping paper strips--1 at a time
4. Paint strip of wrapping paper with Mod Podge--during this step you are trying to saturate the paper to make it lay flat. Getting it saturated is really a key.
5. Repeat

Steps for glitter pumpkins:
I definitely did this pumpkin backwards last year when I did it, but I know a better way now!
1. Mix glitter and Mod Podge in a small bowl
2. Paint pumpkin with glittery paste mixture
3. Let layer dry
4. Repeat as necessary for full coverage

Glue may drip, in fact glue dripped EVERYWHERE on our pumpkins. Because of that, when we peeled the dry pumpkins off the drying surface (a styrofoam plate) some of the bottom of the paper peeled off/stuck to the plate. This is ok! It will all be hidden when the pumpkin stands up or is displayed!

This DIY pumpkin craft is a great craft if you don't like carving pumpkins. I don't really like goopy guts inside the pumpkin, so I am much more inclined  to make something like this! Plus, these pumpkins can be packed and reused year upon year. A year later and our pumpkins look great! 

Happy Halloween Crafting!

xxKatie

Tuesday, July 10, 2012

Crafternoon: Glitter Decorations


I was feeling inspired when we were crafting (more crafts to follow this week--we had a crafty weekend!) on Sunday when I thought that I would attempt something that I've had my eye on from Pinterest:
I didn't use canvases, but chose to do mine on little thin wood discs!
Super plain, $.79 discs I had from Hobby Lobby from MONTHS ago that were lying around.
Then I painted them a random pink I had lying around that I liked.
Then I freehanded my initials onto the painted discs as a guide to where to put the Mod Podge and glitter! We're finally getting to the fun parts!!
I painted MP onto the letters, and I put two coats on to make sure they were wet. (This ended up slightly being a mistake. I tackled this craft with no directions so it was a game of trial and error. You'll still need both supplies anyway!)
I used the glitter and covered the letters with all the Mod Podge. Like I said, this was a mistake. You'll see what I did instead for more full coverage.
I did what all those blogs suggest and mixed a bunch of Mod Podge with the glitter to make a glitter paste and pasted on top of the existing glitter. This worked MUCH better.
It really started to take shape at this point!
Since I used discs instead of canvases, it made hanging a little bit more difficult. I decided to go the 7-year-old-room's-decoration-route and use ribbon! I made a false bow and glued the rest onto a long ribbon.
Then I combined all the pieces and voila:
I was so excited with the way it turned out! I put it on the front of my bedroom door so that anyone who comes over knows which room is mine! I am SO happy with the look and couldn't wait to share it with y'all!

Maybe you'll want to try this craft on your own! It was so easy, cheap since I had everything laying around, and looks great when finished! Happy crafting y'all!

xxKatie

Wednesday, May 9, 2012

Color Change

It's that time again! Color change time! 

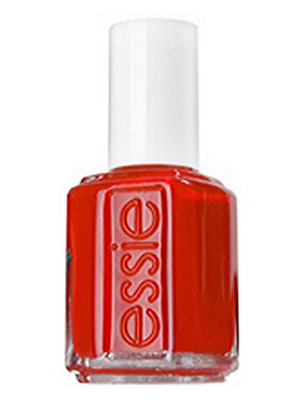
I actually got my nails all soaked off--it'd been awhile since I have had nothing on my nails, so I decided to get the acrylic removed. I hadn't been the one to paint my nails in months, so I decided to paint my own. I went with the whole "statement nail" look after I painted my nails Geranium by Essie!

Most people make their second or fourth finger the statement nail, but I decided to be a bit more whimsical and go with my pinkies! 
I put Ulta Pinata Yadda Yadda on my pinkies!
I'm excited about my new color! I'm not sure how long I'll keep it on my nails, but I do LOVE Geranium!!

Sorry for the junky quality--iPhone here I come so soon!

So do you do the statement nail? What is your design of choice?

xxKatie

Saturday, January 28, 2012

Crafternoon: Canvas + Rhinestones

I saw this craft on Pinterest a few days ago and decided that I NEEDED IT.

Unfortunately, it was "uploaded by user" so there's no tutorial, no guide, no supplies listed, no estimated time of completion, etc.

Well, I started it last night, and it's my crafternoon project today/the rest of the weekend. I thought the "celebrate" was a little cheesy, so I decided to do something else instead! I want it to be a bit of a surprise so I'm not going to spoil it just yet. It's coming along and really looks fun so far, but I'm going to share all the steps in one BIG post so that y'all have a MUCH better idea of how to do it--it's NOT easy, but it's fun and I know I'm going to feel very accomplished when it's done! So far, two of us have worked on it and are about 1/2 way done covering it with the rhinestones...

I know a bunch of people repinned it from me, so I'm interested to hear if anyone else has done it. (Sorry about the picture--since it was uploaded, the bottom portion of it doesn't load on Pinterest and it's just grey bars, but you get the idea!) 

Anyway, I can't WAIT to show y'all mine and will be VERY excited for the big reveal!!!

Best of luck crafting if you decide to do this! PLEASE PLEASE PLEASE share your results!!

xxKatie

Friday, October 21, 2011

Throw Some Glitter, Make It Rain

In the words of one of my favorite pump-up artists, Ke$ha, "Throw some glitter make it rain..."! I was just shopping yesterday at home and I was making the rounds to the usual places. One of my favorite places to raid is our local Ulta. Ulta has great sales and freebies for most popular products. Just yesterday I qualified for a free OPI topcoat or basecoat AND a freebie from Bare Escentuals. Ulta is also great because it's one-stop shopping. I made my way over to the Ulta brand cosmetics counter to check out what they had and it was full of bogo's. I opted for a 2/$6 for items that were usually $6 so it was basically buy one get one free. I picked up this nail color:
Pinata-Yada-Yada

It is a $6 alternative to one of my most lusted after colors out there, Happy Birthday by Deborah Lippman of Lippman Collection:
I just can't really bring myself to spend nearly $20 on nail polish...ok it's actually $18, but I digress. I was so excited to have come upon this other color that seems to be very similar! One of the big differences in the Lippman Collection color, atypical of other glitter polishes is it's very large pieces of glitter. Pinata-Yada-Yada has those exact same ones! There were a BUNCH of the bottles just like the one I snatched up (probably 9-10 left after mine) but it's not listed on the website so run to your Ulta to see if it's there!!!

I know it's not always the classiest, but glitter is SUCH a guilty pleasure of mine...if only you could see my toe right now!! 

xxKatie

Sunday, January 9, 2011

Outfit of the Day: Chunky Glitter Flats

So the adjective "chunky" doesn't ever really end well, but this time I promise it does!! Anyone remember the Kate Spade flats I posed about awhile ago that I fell in love with:
Nell by Kate Spade

Well, I found a pretty good alternative to them! They were on sale at Charlotte Russe for $10! They had my size and I couldn't NOT buy them!
They have a rubber bottom and I like them a lot! They show a little bit of toe cleavage (not a huge fan of that) but like I said, I couldn't pass them up! I wore them for the first time (beyond just wearing them around my room) last Friday:

My sister gave me the gold Kate Spade bow earrings for Christmas and it was also the first time I wore them! Since the shoes were outlined with gold, I figured gold jewelry was the best to pair it with so I put on a fun J. Crew necklace and paired it with my fabulous earrings!!

xxKatie

Monday, December 27, 2010

NYE Statement Picks

New Year's Eve says one thing to me: go big or go home. Events are big, lights are sparkly, everyone's a little bit more bubbly from the bubbly. I think that if you're attending a NYE party or event, your outfit should speak all about it. Here are my choices for NYE dresses:

If you hadn't already guessed, I'm a big fan of sparkles for the holidays! I would love to wear some of these dresses, but I rarely get dressed up for NYE! It's always chilly whenever my friends and I decide what we want to do!! 

What will you be wearing? Anyone have any fabulous plans to share?

xxKatie

Sunday, December 19, 2010

Holiday Clutches!

With Christmas and New Year's right around the corner, every girl's gotta have a good clutch to keep the essentials in! Here are some FABulous choices to keep all your girlish goodies in:

Get Your Glitz On Sequined Bow Clutch: Betsey Johnson (Pair me with the perfect LBD! The gold is tres chic too!)

Hamish Pouch: Piperlime

Glitzed Oversized Sequined Bow Clutch: Betsey Johnson (This is such a versatile clutch--you could use is for so much!


Pop Art Pearle: Kate Spade


Reva Clutch: Tory Burch


Expressions NYC Sequin Box Clutch: Nordstrom (#1 PERFECT FOR NYE and comes in 4 colors)

Sondra Roberts Rose Satin Box Clutch: Nordstrom (8 color options...check out Pewter!)


Have any great clutches you depend on? I have a great platinum colored Nine West clutch that I got from Piperlime for prom! I LOVE it!

xxKatie