Showing posts with label Hair. Show all posts

Saturday, November 10, 2012

The Dry Season

I'm not referring to weather, but instead hair!

Does you hair get so dry in the winter? I usually really struggle with blow-drying my hair since my hair is so thick, and then it never really looks the way I'd hoped and it takes me 45 minutes just to get it dry.

I had a great hair dryer, it was one I got before I went to college and from Target, and it worked well, but it really lost a lot of it's kick compared to when I had originally purchased it. Recently, Misikko sent me a brand new hair dryer!
I have never used a hair dryer like this one! 

When I say it takes me 45 minutes to dry my hair, that's after it's been air drying for awhile. I would post a picture or video, but y'all would get bored it takes me so long. I also am NOT skilled with a round brush, so it's probably a little inefficient on my end, but this Misikko hair dryer has totally transformed the way I do my hair! It has cut it in half AT LEAST and makes getting ready so much better and faster.

My mom is the QUEEN of blow drying and always has the perfect technique and set of brushes. Even she signed off on this hair dryer! She wants to get one herself! I'm telling you, her blow dryer seal of approval is HUGE. I bought her one last year for Christmas that she never used because it wasn't powerful enough and she signed off on this one. 

I use this dryer on the highest heat setting with the fastest air and it is perfect. At the very end of my blow dry sesh, I blast the cool air for a little to cool my head off and help seal my hair--I read somewhere (where...hmm...not sure...?) that cool air is good at the end for your hair follicles. It takes me so much less time and is definitely a dryer worth checking out!

xxKatie

Tuesday, October 30, 2012

Free (Water) Fallin'

Something I always wished I was good at doing is hair. I'm not good at curling, my arms get tired trying to do updo's, and I cannnnnot manage to do a sock bun on myself. I get frustrated VERY easily and then tend to give up!

One of the girls who works at the store with me texted me and asked if I could do a waterfall braid. I texted her back saying I didn't, but look for something on Pinterest like a how-to or something like that that might help. I didn't think about it again until I went into work that following Friday.

She ended up coming in and we played around with it and then finally figured it out! It was SO easy!!! Like I said, that's coming from someone who's NOT good at doing hair! We found a quick tutorial that was easy to understand:

We followed this set of rules and did it ourselves! The first time it ended up cute, but we took it out and re-did it with a better strategy in mind. The second time it came out GREAT! Once we got to the end, we ended it with a clear elastic and wrapped another piece of hair around the elastic, securing it with a blonde bobby pin! Taylor wore her hair like this to a wedding and it looked SMASHING! This is a great hairstyle instead of doing the usual half-up-half-down look and it definitely adds some va-voom to your look!

xxKatie

Friday, August 31, 2012

The Art of the Sock Bun

I FINALLY DID IT!

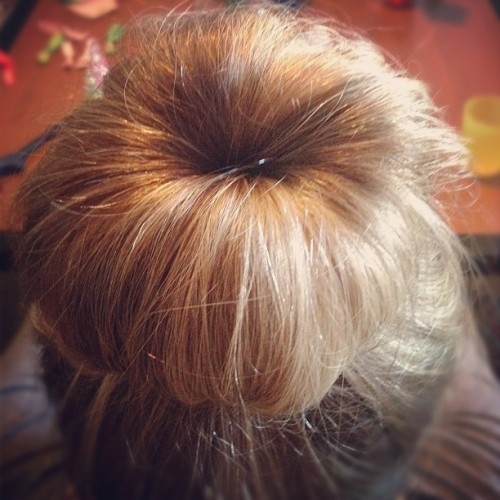
Note, not to my own hair, but I did this to my hair model Hannah's hair! I LOOOOOVE the way that it turned out!

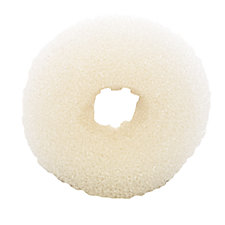
I've been trying and trying and trying to master the sock bun. I actually saw something on Pinterest about the sock bun being created from a legitimate sock...well I'll just spoil that plot now, IT DOESN'T WORK. You need this:

We snagged our sock bun donut at a Sally Beauty Supply store for less than $4!

In order to do a sock bun, you: 
1. Put your hair in a pony tail. Use a regular elastic to secure the pony on your head.
2. Pull the pony straight back (or up) depending on where you want your sock bun to be.
3. Take the donut and place it at the ends.
4. SLOWLY roll the ends INTO your pony, wrapping hair into the donut as you go down your hair.
5. There will be loose ends at the base, wrap those around the pony and mush them into the bun (such official terms...I know...)
6. Spray a little hair spray once you're in place and you'll have all the staying power you need!

Recommendations:
1. HAVE SOMEONE ELSE DO THIS. Your arms get tired and it would be tough to have to do it on your own.
2. Your hair will work better when it's straight--i.e. I tried it on my curly haired friend Colleen too, and it was TOO voluminous once it was in the bun. We could definitely do it, but it was easier with straight hair.

I got tons of great response when I posted this photo on Instagram, so I'd love to hear everyone's experiences doing it! Could you do it alone? Any good tips?

xxKatie

Monday, August 27, 2012

Crafternoon: No-Crimp Elastics Day 2

Yesterday's post featured our DIY no-crimp hair elastics! TOO cute!

Today makes them even more special though! This is an AWESOME twist on these DIY hair ties so now you can make them more personal:
MONOGRAM IT!

If you can personalize something, it makes it that much more fun!

When we were shopping in Michaels, the idea came to me right after I checked out. I made my friends wait a few more minutes so I could run back and get paints:
I used the cheap Michaels brand paints that look like this. They came in close to like 40 or 50 colors so you can REALLY personalize what they look like!
I made this one to add to my sister's care package!
This one was for my friend Jami--who actually has the same monogram as her sister! Isn't that the coolest?! What a great idea for hand-me-downs!
This was for Miss Colleen!
Now you can see what they look like once they're completed. The monogrammed hair elastics have longer tails on the ends, so be sure to keep enough room to add the monogram!
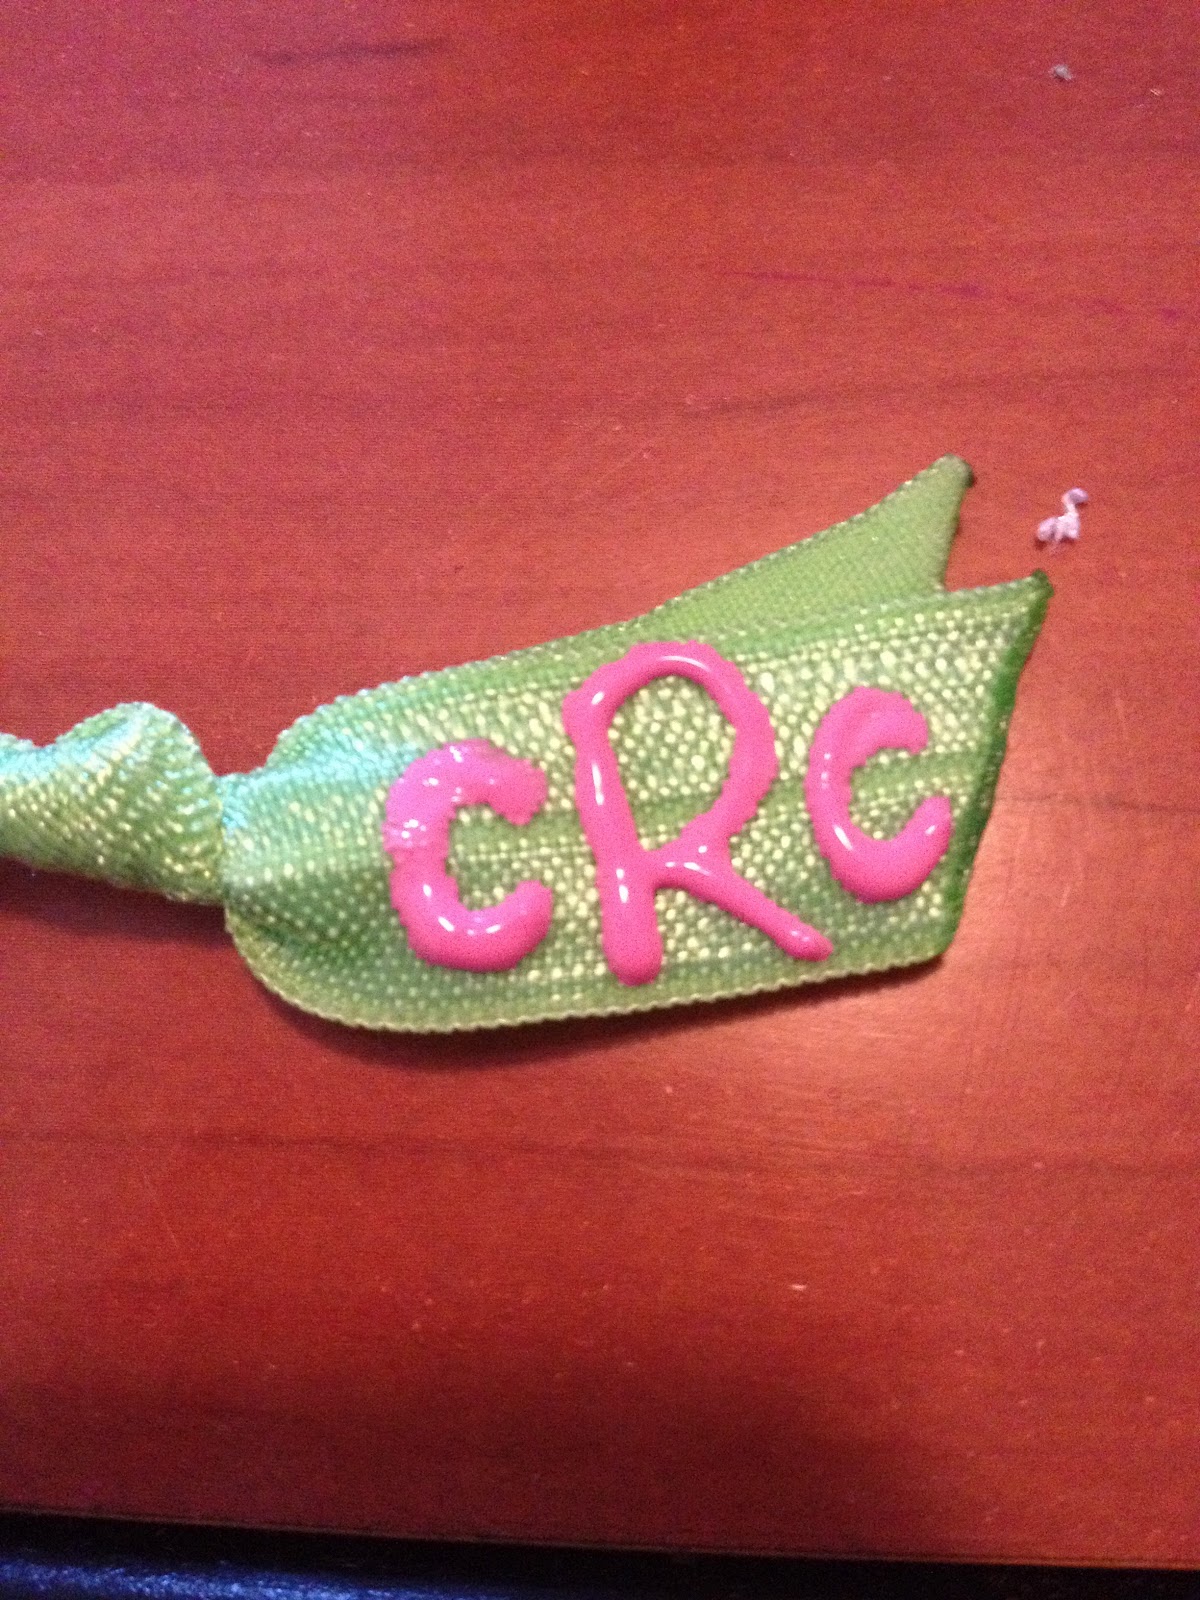
I am SO pleased with the way that these turned out! I used multiple colors for the cRa elastic since that one was mine--it was just as easy! I started with the BIG last name initial and then did the smaller first and middle initials. You can also just use your first letter initial too! That was the first one that I did to test the waters!

I am OBSESSED with the way that these turned out! I couldn't wait to share them with y'all! 

Happy crafting! If you make some of your own, be sure to post them on Instagram or Tweet them and tag @letsbepreppy on BOTH!

xxKatie

Sunday, August 26, 2012

Crafternoon: No-Crimp Elastics Day 1

I'm sure y'all have seen these hair ties EVERYWHERE! I'm sure you've also seen their OUTRAGEOUS price tag. Usually a pack of 4 is more than $10! I've seen them places as expensive as $4 for ONE!?!

I. Think. That. Is. Insane.

It's a glorified hair elastic. Yes, it's pretty and colorful, but eventually will get stretched out or lost just like every other one you've ever had. My friend Hannah and I decided that we just weren't ok with buying them and wanted to do them on our own!

The follow supplies are all you need:
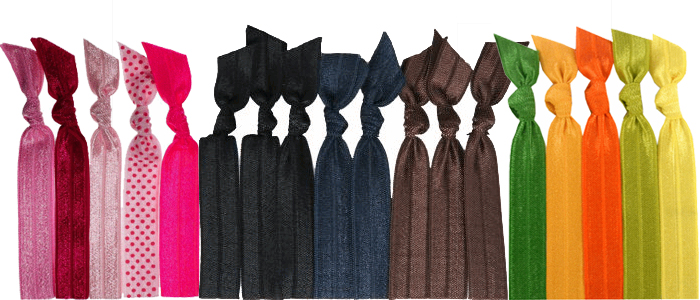
Elastic material, we got these packs from Michaels. Right on the shelf! Didn't have to order them from anywhere special!
This is what it looks like up close. They came in like 7 or 8 different colors, and I snagged all the ones I wanted to try!
Use a REALLY sharp scissor and a far away/distance lighter--don't use a close up one, you'll want the space between your fingers and the lighter (especially if you're wearing nail polish like I am always)!

You cut the elastic to a length you like, and then tie it. The length can be tough to decide since smaller ones will be tighter. If you have hair like me, it's insanely thick and I needed more stretch and extra "circles" to twist my hair through than most people! I found that about 7'' was pretty common. I just used the length from the tip of my middle finger to the end of my palm and used that measurement...so official!


Twist and tie until you get the shape and length tails you want! Once you have those, burn the ends to seal the elastic. (Mom, I know you're going to cringe since we were dealing with fire...) You don't have to put it in the flame, but just close enough. The elastic CAN catch fire, but it never needs to be that close.

(Nail color: Essie's "Cute as a Button") 
You can tie it this way, with the tails together by making a simple knot and it will look like this in your hair:

You can also tie it in a knot like you'd tie rope, with the tails apart:
(Nail color: Essie's "Turquoise and Caicos")
It will look more like a bow in your hair:
Also very cute!

Tomorrow's post is a special twist that you can put on these famously no-crimp hair ties! I cannot wait to show you the special change I made to make them SO CUTE! Y'all will FLIP!

xxKatie 

Saturday, May 26, 2012

Volume In A Bottle

With this short hair comes some hair-do difficulty. Sometimes getting volume is a little hard because between blow-drying and straightening, my thick hair tends to fall flat. That was until, I came upon Loreal Everstyle Volume spray.

Let me preface this by saying that I don't really like hair products. I rarely ever use anything out of the ordinary besides shampoo and conditioner and the occasional hairspray. I'm not very adventurous when it comes to hair products. I feel like usually you just end up with very greasy hair by the time you go to bed anyway.

Back to the volume problem.
Or should I say, volume problem no more.

I LOVE Loreal EverStyle Volume Root Lifting Spray.

You spray like 3 or 4 puffs onto your wet-ish roots and blow dry. AKA I flip my head over dry for about 5 or 10 minutes and flip back up, red face and all. This stuff works WONDERS. I would be curious to know if this would have worked on my old long long long hair, but it works GREAT for my new do!

I have NO volume problem anymore, and that's even post straightening. In fact, just this morning I used it and almost wanted time for it to flatten a little--a thought I would have NEVER expected to cross my mind! 

I am SO excited that I've finally found a volume product that is reliable! Now I just need to find a good straightener and I'll be on my way to REALLy taking care of my hair!

On that note, any good suggestions for a straightener? Preferably I'm thinking about a skinny one? I'm on the fence between brands and reviews are ALL over the place for different straighteners--hook a sista up with your favorites!

xxKatie

Thursday, May 10, 2012

New Do, New You

I have SUPER short hair now!!

This is the last tagged photo of me from my friend Jami's 21st birthday! This was a few days ago so my hair was at the longest and most recent pre-haircut:

I'm sure most of y'all saw my tweets about the haircut yesterday! I went to a great salon in Columbia called Ashley's Alley, and my stylist, Keri, was wonderful. She was recommended to me by a friend and did a great job. She was SO speedy too--I was washed, cut, and blow-dried all in less than 45 minutes. The location is moving, but if anyone in Columbia needs a new hair stylist, shoot me an email and I'll forward you her details!

You can also see a bit of my new house in the background--a very small bit! Our AMAZING pink couch! One of my roommates had a HOT PINK COUCH that's now happily residing in our living room!

I am so excited about my new hair and can't wait to really see how it feels once I'm the primary stylist!

Have you ever made a DRASTIC haircut? Did you like it or did you want your old hair back?!

Friday, October 14, 2011

The Mini Clip

I am a clip girl. Part is growing up in the 90's, part is me hating having hair in my face. Either way you juice it, I'm a clip girl. 

I use two sizes of clips. These are the mini Mini Clip. I take the front part of my hair (parted on the right side--my Momma always taught me a middle part points straight to your nose) and pick up the left side with all the hair and pin it back.

I have SUPER thick hair, and I can never use bobby pins. I always liked Lauren Conrad's X-pinned hair but 2 pins was NEVER enough for my luscious locks, so I use these clips.

This photo is from our intern shoot for Bayside Bride but it's one of the clearest ones of how I tend to do my hair. As you can see, my very far side part with the side with all the hair pinned up with the clip. I don't use any products or anything to secure it further, and it usually stays for a few hours. If there is a lot of hair flipping or absent-minded hair fixing, I'll have to readjust the clip but usually it's decent.

Do you have a go-to hair do? Do share! Any good ideas for a girl who can't use bobbys?

xxKatie

Friday, August 12, 2011

Carolina Keeps Callin' Me Home!


All I can think about is going to school on Sunday!

I'm starting to pack, say goodbyes, and make those last minute purchases for back to school! This song is a CONSTANT reminder of getting back to school and reuniting with all of my friends! I'm in the process of making visit plans for my friends who are at home to come see me and Momma and Daddyo will be back to see me about a month after classes start for the big Navy/USC game!!

It's just another song about missin' you
Like a phone call from my baby saying, "Honey I miss you like crazy"
Just like the sound of a siren's song
Oh Carolina ya keep calling' me home
Callin' me home!

xxKatie

PS: I'm off to get my hair cut today! Wish me luck!

Wednesday, July 20, 2011

Summer Braids (Formerly Titled: "Long Hair Don't Care")

Let's get one thing straight: I have never ever ever liked having my hair in my face. It drives me nuts. When I take tests, I automatically put it back in a ponytail despite any straightening or styling I've done. I get so distracted by having my hair in my face that it is almost always tucked up or pinned or half pulled back in some way (excuse all the awkward self shots...I raided my profile pictures album):
Tucked back take 1...from Bayside Bride (if I wear my hair down, it typically means just like this)
Half up...from Christmas
Pulled back...at a party
Restrained with a headband...at a football game (I KNOW for a fact this day I put it in a pony because it was SO STINKIN' HOT, but we beat Alabama so naturally my hair-do/overall looks were NOT my priority that day)

Case in point, this summer I've been rocking the braid. Whether it's french braided or a regular fat braid in the back, it has been the perfect way to wear my hair without looking like I just got back from the gym.
I want to master this side/french braid because it's so put together! If only LC wasn't in every "good hair" picture everywhere. Whenever I look for good haircuts she ALWAYS ALWAYS ALWAYS pops up!
I may or may not have googled how to french braid your own hair or something along those lines so I'm not a seven-year-old asking my Momma to help me with my hair...

Anyone else out there rock the Summer braid? Any tips for french braiding your own hair? This girl could use some tips!!

xxKatie

Tuesday, July 19, 2011

Weekly Gratitude

In my not-so-busyness of being at the beach, it seems that I'm a day behind for my weekly gratitude!

1. I am thankful that I was able to come out to the beach for 4 days! This rules!
2. I am thankful for ROCKING my summer classes and as a bit of a reward my Momma treating me to these babies that should be awaiting my arrival at home tomorrow:
3. I am thankful for Shop It To Me's reward program because I'm getting FREE SHOES! What's better than ordering free shoes? The shoes arriving of course! I'm expecting these espadrilles coming soon (and with free shipping!) from Piperlime:
4. I am thankful for the week off that my hair got as well. No straightening it, no blow drying, just salty air, sand, sun and the elusive, natural, air dry. I'm thinking about getting my hair cut soon but having this super long hair has been really fun! Tough decision...
5. I am thankful for AmazonPrime. If y'all haven't signed up for it and you're a student, YOU NEED TO. It's free and you get free shipping on so much stuff. Besides my Momma ordering those boots with my AmazonPrime account, I ordered a few DVD's with it and they were all shipped FREE! Seriously look into it. Now.

6. I am thankful for Burt's Bees Lip Balm. Big time. This stuff works real wonders. I got some of my topical face gel on the tippy top of my upper lip and this stuff has really helped to heal it! This girl is ADDICTED.
7. I am thankful for some of my new purchases that I've made recently. Recap to come soon. Summer shopaholic? Not exactly. Getting close? Maybs, but a lot of it has been FREE! I heart free stuff as much as the next college kid!
8. I am thankful that my FAHBULOUS manicure from last week has lasted ALL week long with only minor bumps and scratches to speak of. Manicure win thanks to Bella Salon in Annapolis!
9. I am thankful for the beyond perfectly perfect beach weather that I got to share with Momma (and Daddyo for a day) all this time at the beach! I'm talking warm weather, no humidity, beach breeze kind of perfectly perfect. Yeah, that JUST happened.
10. I am SO THANKFUL THAT I GET TO GO BACK TO COLUMBIA, SOUTH CAROLINA IN 1 MONTH! 1704, GAMECOCKS, VC + UA, DENSE SC AIR, SUN, FOOTBALL, FABULOUS FRIENDS I MISS SO MUCH, AND ROOMMATES, HERE I COME!

xxKatie

Thursday, December 30, 2010

Advice Needed: Hair How-To Help

Say that five times fast! So I found a set of Remington Hot Rollers in my house and tried using them for Christmas Eve but got so frustrated and sick of YouTube videos that I quit. I have this set:
Half are big ones and half are smaller ones and I just could NOT master them. I should have practiced a few times before thinking I could just get it! 

Anyway, my goal out there is to learn how to use them properly!! Anyone have any tricks? The look I'm going for is mostly volume and curl at the bottom of my hair. Think little curls right along the bottom of my hair to change-up straight hair. How do you also not get the crimp from the little holder? I have extremely thick hair also, so is it just silly for me to even try these? Next time should I just try velcro rollers instead? (That will also require multiple tutorials...)

If there's anyone out there who can console me/train me on hot rollers let me know!! I'd very much appreciate it!!

xxKatie

Tuesday, November 30, 2010

Hair Do

About two weeks back, I got an email asking me how I do my hair. I don't use much, but here are the fab products that I do use!
Bed Head Rock Star Hair Dryer
I love this dryer! I got it before I went to college at Target for like $37 and it's great! I use it with the funnel-like attachment and it works great. There are three speed settings and two temperature settings with a third cold air option. It also tells you when it's overheating or when there's hair stuck in the nozzle.
Remington T-Studio Wide Plate Ceramic Straightener
I really like Remington products. I've had many different straighteners and I think this one is the best. I have super-duper thick hair, so I can't use those small thin straighteners. I've used the wet-to-straight straighteners and I DO NOT advise using those at all. They made my hair feel like straw and VERY gross.
Herbal Essences Color Me Happy Shampoo and Conditioner
This makes my hair so shiny I would totally advise using it. It's also pink which coincidentally matches the rest of my bathroom, but I would definitely recommend it. It keeps my hair healthy and in great condition!

I don't use any other "products" other than hairspray every so often if I'm wearing a real hair-do, so I mostly stick to these ones! What do you use? Have any good options?

xxKatie

Thursday, September 23, 2010

Headband Love


I love L. Erickson Headbands! The Trixie Bow Headband is quite possibly my absolute favorite. My mom got me one that she found in a Marshalls or TJ Maxx along with a few others. I didn't know much about the brand until I looked at the tag and saw that it was a real company and not just the knockoff or junk. I have the champagne colored one and I wear it ALL the time. 

If I don't straighten or blow dry my hair, I'll pull it back in a lowish bun. I don't always like how plain that looks though, so I'll often throw on a headband to give it some kind of polish. I have a few go-to headbands that I wear a lot, but the L. Erickson is definitely one of my favorites, plus the neutral color coordinates with a lot of different outfits! I like skinny ones too for a more professional look and I think that both black and tortoise look very presentable. Here are a few of my favorites:


Forever21: I have 4 sets of these headbands and they're great! Sometimes they hurt my head, but I generally don't wear headbands all day anyway.

L. Erickson: I'm sure you could find this type of headband almost anywhere if you looked. They're so simple, and I had a great one from Claire's that even had little grippers that kept it in place, but I sat on it and it cracked (haha!).

Forever21: When I bought mine, I thought it only came with one, but I really like this headband set. The pearls look nice and then I really don't have to wear any other accessories!

L. Erickson: This again is very cute and I'm sure you could find something similar easily! I just love how fun and playful the shape is and it's part of their Ultracomfort line, so I'm sure it wouldn't hurt!

J. Crew: I like the neutral color of this headband, like the one I have. They're so wearable and the rhinestones add some flare! I have had a few J. Crew headbands, and my biggest piece of advice is to try them on in the store because sometimes the way they're displayed makes them take a funny shape. Also, check J. Crew outlets for headband STEALS, they always have them on the 30% or 40% off racks and counters!

L. Erickson (there are a lot of these): I've written about this bow before, but the Bit Headband so too cute! I love the gold and this would add such a great pop of color to any outfit! They have SO many to choose from!

Forever21: I have this is 2 metallic colors (copper and silver) and I wear them all the time. I'm not as fond of wrap headbands because they sometimes give you a funny bump in the back of your hair by your neck where the rubber band rides up a little. I do recommend forever21 for headbands though because they have great quality and tend not to hurt as much as some of my other headbands. 

J. Crew: This is actually from the little girls' section of J. Crew, but I've bought them before and they've fit fine. I really like the "statement" headbands. My friend Laura sometimes wears them and they always look cute, but I just haven't gotten the trick of them yet! Do you put the big embellishment on the side of your part with more hair or the side with less hair? I don't know...any advice is appreciated!

I know headbands were big when Gossip Girl started, but anyone else a headband fan? Where do you look to get yours?

xxKatie